Mom, Wife, Chef, Gardener, Dog Wrangler, Mom, Writer, Friend, Daughter, Sister, Mom, Creative Problem Solver, DIY Chick...figuring out life one day at a time.


Tuesday, August 5, 2014

Mom/Gardener...our first big garden.

So I guess it's official, I only blog once a year. So much for keeping up with the blogging. Oh well. This spring we decided to dive head first into gardening here in Montana. Our elevation (4000ft) and our zone (4) combine to give us a very short growing season, so we started by only ordering seeds meant for colder climates and shorter seasons. We started most of our seeds indoors and quickly learned how to cat proof our seed starting area.

seedlings enjoying the sunlight


We had to start from scratch with the garden area, so as soon as the ground was no longer frozen, about mid April, we started tilling up the garden area and building the fence and greenhouse.
 

Tim breaking ground.
 
We were lucky because our neighbors to the North have cattle, and that means lots of manure, they were happy to let us have two big truck loads of it to help enrich our garden soil.
Tim building the greenhouse.
We used old cattle guards that Vernon had lying around to build the fence and Tim attached a dome to a section to form the frame for our greenhouse. In the end we ended up with a 20 x 40 foot garden, with the greenhouse on the north end.
garden rows with greenhouse.

 By the beginning of May we had our garden planted. Our quick summary of plants: red potatoes, yellow potatoes, two types of Swiss chard, Tuscan kale, beets, turnips,  bok choi, fennel, Brussels Sprouts, red and green cabbage, broccoli, cauliflower, yellow and green zucchini, artichoke, plum tomatoes and slicing tomatoes, green bell peppers, banana peppers, Jalapeño Peppers, cucumbers, fava beans, green and purple green beans, snow peas, English peas, carrots, pumpkins and butternut squash.
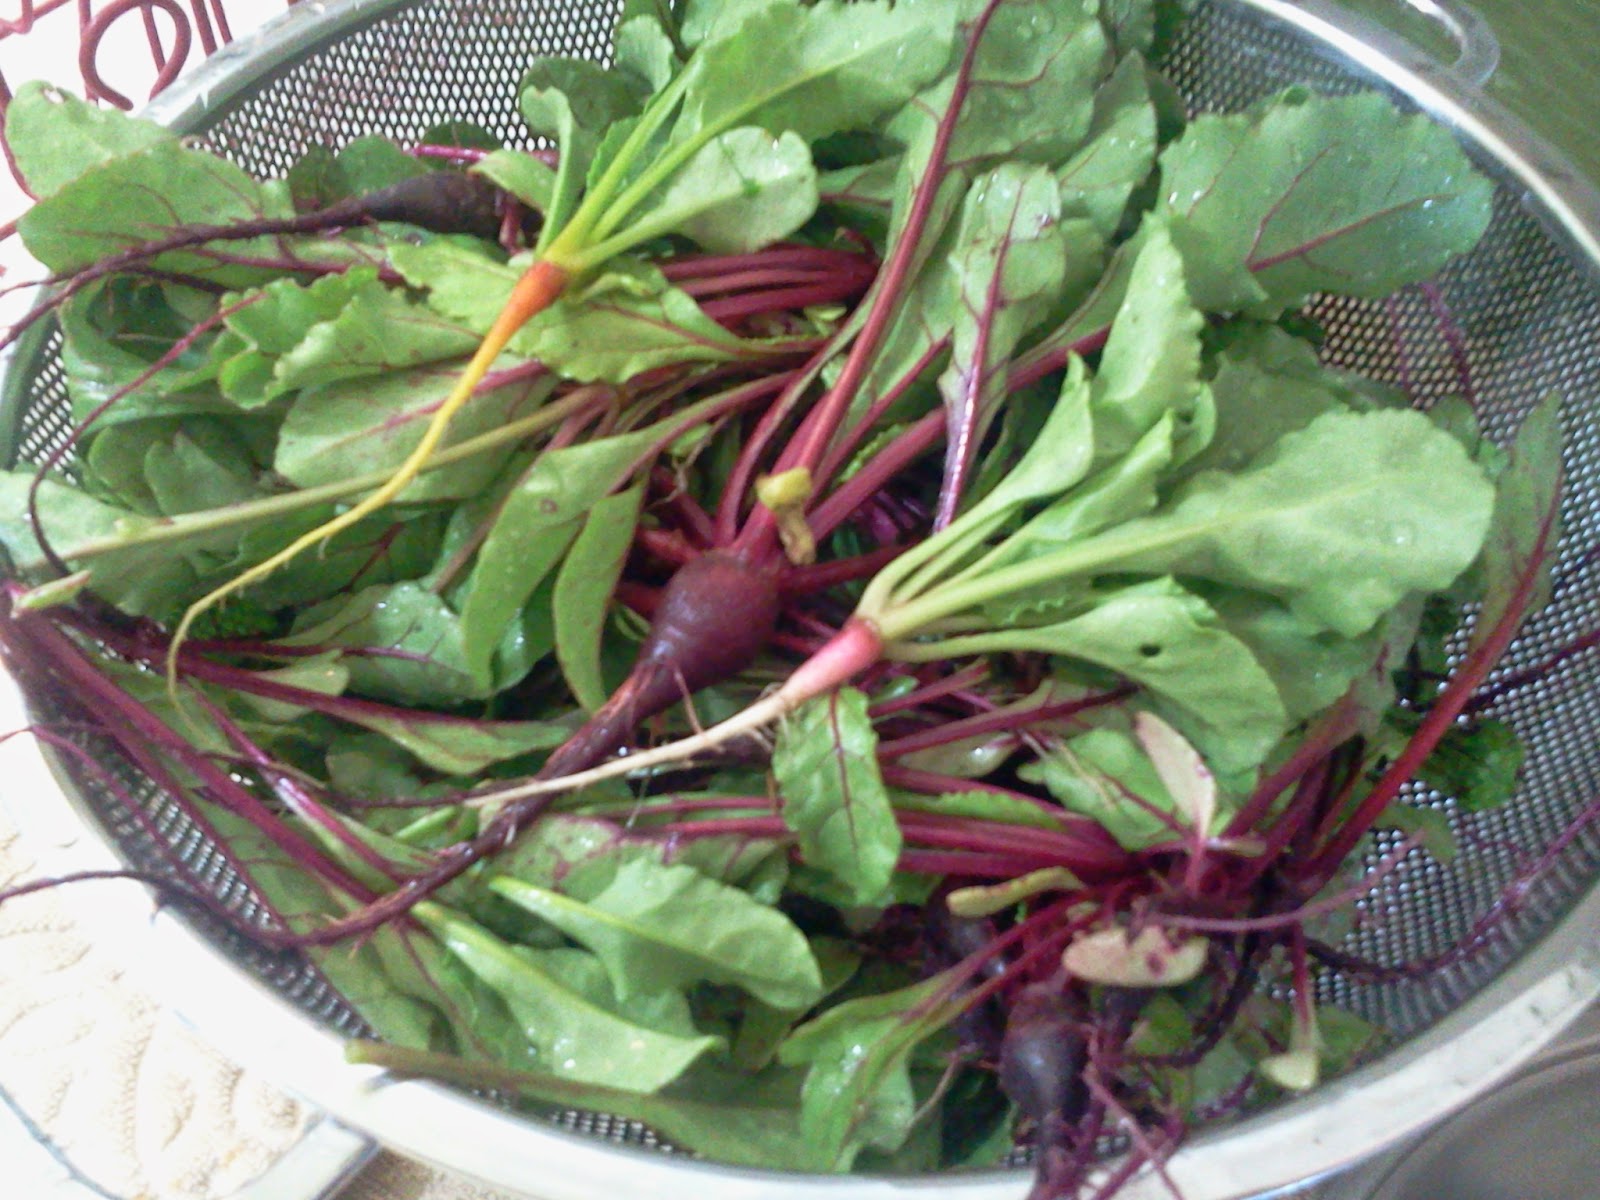
Happily, most everything is doing well. We were aware that with full time jobs and two kids we wouldn't be able to spend hours a day in the garden so we put down gardening cloth to suppress weeds and are using a lot of mulch to help keep the weeds down in the paths as well. Both of those things have saved us so much work. One happy lesson I learned is that when you are thinning your plants, those baby plants don't have to go to waste. Especially if you were lazy and let them start to form small carrots, turnips, and beets before you got them thinned out. I made some really delicious sautés with the thinned root vegetables this spring.

Thinned carrots, tops and all, make a really good pesto.

To wrap this up I think I will just let the pictures speak for themselves.
artichoke

beet

escaped winter squash

fennel

fordhook giant chard
Connor in the garden after a storm blew off our greenhouse plastic

green beans

Harper in the garden and some pea trellis

kale

mint

peas

peppers

rows of potatoes

red cabbage

royal burgundy beans

cube of butter yellow squash
tomato jungle and trellises

tomato close up.

Sunday, October 6, 2013

Mom/Writer...Notes on a Montana Summer.

So fall is here. In another month we will have hit our one year mark in our Montana adventure. And looking back I see that the last time I posted was in April, just after the kids' birthdays. Obviously I've been falling down on the blogging job. Why that is so will hopefully become clear when I tell you about our summer. After April (the month of birthdays) passed, I started booking some catering jobs here in town. Mostly for some women I met through playgroup. One woman's husband runs the electric company here in town and he ended up using me for several company events. It was fun, if a bit hard juggling preparing for the events with kids running around underfoot begging for attention. I've had several events over the summer, though not enough to constitute a full time job. I have taken some steps towards building a catering business here though, including getting a City of Cut Bank business license. In the new year I want to join the City Chamber of Commerce, in hopes of furthering said business.
In June, Tim and I had the stressful realization that if we didn't find a way to increase our income RIGHT NOW, horrible, horrible things would happen. Luckily, a friend of ours is the dietary manager at the local nursing home, and she needed a new cook RIGHT NOW, or horrible, horrible things would happen. So I went back to work.  What started out as a temporary job quickly became full time. So most of our summer has subsequently been taken up with our family learning how to balance everything with two working parents instead of one. When and how cleaning gets done, transportation, child care, animal care, everything has had to be renegotiated and reorganized. At first I was working all dinner shifts, which meant Tim and the kids were eating dinner without me five nights a week. But after several staff turnovers, I have managed to rework my schedule so I'm only on dinner shift two nights a week, which makes it a lot easier on all of us.We struggled as well with finding a babysitter, in fact we went through three in the first two months I worked, but that has finally worked out as well. Even though the kids still aren't totally happy with me for going back to work, we have finally started to find our equilibrium and they no longer throw huge tantrums at me the second I get home from work, and instead are like "hey Mom's home!" then go back to playing.
For the most part I really enjoy my new job. It's nice to be in control of a kitchen again, and the residents of the nursing home are all pretty nice, and so are my coworkers. The hours aren't too bad, though getting the kids to the babysitter's at 5:50 am so I can be to work at 6 am has definitely been a struggle. But it means I pick them up at 2 pm and have the rest of the day and evening with them, and we all get to eat dinner and go through the nighttime routine as family, so it is worth the early mornings. Plus getting up so early means they finally go to bed before 10 pm, which has been a huge help for my sanity.
The other bump for my sanity has been  that Harper finally sleeps through the night (most nights). Tim and I (mostly Tim) put our feet down and did an intensive week of sleep training with Harper. She was still waking up to nurse once or twice a night, which had to stop. Tim slept in Connor's bed for a whole week (Connor shared with me), so Tim would hear her when she woke up. He would put her back to sleep, and after a week of not getting to nurse in the middle of the night, she finally gave up.  It only took me another full week to learn to sleep through the night myself.
Other things that we have done this summer include two trips up to Glacier National Park (only 45 minutes away!),
Tim teaching Connor to fish at Two Medicine Lake.

visits from Grandma Rhonda, Auntie Jana, Uncle Jack and Aunt Becky, and Auntie Maya.
Maya at Two Medicine Lake.

I had lots of panic attacks about rattle snakes, though we only ever saw any while we were driving and they were crossing the road. Thankfully we never found any on the property. Our chickens and guineas got huge, and the chickens finally started laying halfway through August.  We have 13 hens and are now averaging 10 eggs a day. The turkey and excess roosters we had have been harvested and are now in our freezer. Our turkey ended up around 18 pounds cleaned weight. Not too bad, we are looking forward to cooking him this Thanksgiving.
Connor and Harper playing on a hay pile.

Harper and Tim on a tractor.

We had some sad times this summer. Our beloved dog, Winter, passed away.
Toby and Winter

That was a hard first week. Toby, our other dog, has had a difficult time adjusting to being a single dog. He is much quieter and clingier than he used to be. He now has a little more company though, since we adopted two kittens.
Bo and Bella

 Bo and Bella are adorable, and totally love Toby. He is still unsure about them however. He tends to growl whenever one of them comes near him. Which is pretty funny, considering the size difference.

Kittens, by the way, do not respect your blogging time. However they are much easier to type around than kids are. Bo is currently chewing on the cord, while Bella is watching me type this with great interest.
This September we hit a huge milestone, Connor had his first day of school!
Connor's first day of school.

It's only preschool, but still. He goes twice a week and he LOVES IT! He still goes to speech therapy every week, as well as seeing a speech therapist at school. His language skills are growing by leaps and bounds, he has so many words now, and while a lot of them are just the first syllable of the word, he strings two and three words together without prompting, and tries to have actual conversations with us. I am so proud of him!
Fall comes on fast here in Montana. We are at a pretty high elevation (4,000 ft) and have already had a killing frost (19 degrees F) two nights ago. We had almost a week of 35 degree days, then today it warmed up to 60 and I thought summer had come back. The leaves are falling from the trees almost before I noticed they had changed color. The sunset today was all shades of pink and orange, decorated with wispy white clouds. The Montana slogan, "Big Sky Country" is no misnomer. The sky here truly is huge, it seems to stretch forever and the clouds create some amazing shapes across all that blue.
After almost a year here I can honestly say it is incredibly beautiful. We have had some fun adventures and met some very nice people. However, I don't know if I can call it home yet. We do enjoy it here, but after almost a year, homesickness is setting in hard. We just bought plane tickets to go back to Washington for Christmas, and we are so excited about it.
Well, it's 10:30 pm and I am turning into a pumpkin. Sorry if this rambled a bit, but hopefully it gives you  little insight into our busy summer. We love you all and look forward to seeing you for the Holidays.

Love from Montana,
the Gundersons.
Hiking at Two Medicine.

Friday, April 12, 2013

Mom/Chef…notes on dehydrators.


This year we spent a little of our tax return money on some kitchen gadgets, some that were replacements for our badly worn out ones (like our totally broken food processor) and some that we had coveted for quite a while. Even though neither Tim nor I cook professionally any more, I guess you can’t totally shut down the inner chef. One of the most useful gadgets we got was a dehydrator. I had wanted one for years but always thought of it as more of a one-trick pony, something that I would use for a few weeks and then put on a shelf to gather dust. But in the two months that we have had it, I have it running once or twice a week. It has really helped us keep up on using all of our Bountiful Baskets produce and has started to change our snacking habits for the better.

After a lot of research including this article from Mother Earth News, Tim and I chose the Nesco 700watt Food Dehydrator. It is reasonably priced, versatile in the different tasks it can perform, and has plenty of trays and accessories for a reasonable price. First off, I recommend the higher wattage because it makes the drying time faster, most things can be dehydrated in an afternoon, instead of two or three days. This Nesco model has a temperature gage that allows you to fine tune your heat level, depending on what you are dehydrating. It stacks and stores easily, doesn’t take up too much space on the counter, and while you can hear the fan working, it isn’t an intrusive noise level, more a soft background noise. The criticisms I have of this model is that it doesn’t have an on/off switch, which means if you want to check your food you need to unplug it. Also it would be nice if it had a timer on it, we over-dried an otherwise yummy batch of venison jerky because we got busy with bath and bedtimes and forgot that we left the dehydrator running. (The jerky is still edible, just a little tougher than we had wanted.) Tim suggested an outlet timer, you can pick them up at hardware stores, you plug the timer into the outlet then plug the dehydrator into the timer, when your set time is up the timer will switch off, thereby shutting the dehydrator off as well. We haven’t gotten one yet to try, but it should solve the problem nicely.

Overall we are really happy with the choice we made. We have made two different batches of jerky: one where we just thinly sliced the meat before flavoring it, and one where we used ground meat and put it through the jerky gun. Honestly, a jerk gun is just like a cookie press, only bigger. The ground meat/jerky gun version makes a more tender jerky that dehydrates more quickly than the sliced meat version.

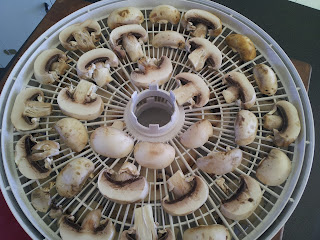
We have also dried bananas, strawberries, mango, apples, celery, green peppers, mushrooms, and several different herbs. We used some of my homemade marmalade that didn’t set up as firmly as I would have liked and made a fruit roll up. Very yummy. Dried vegetables are great when you are making soups and sauces, things that they will rehydrate easily in. Being able to throw herbs in the dehydrator keeps me from having that half bunch turning to mush in the back of the crisper drawer. Plus drying your own herbs makes for a fresher tasting product, much more flavorful than what you can buy in stores.

 Dried fruit of course, is great in so many applications: as a snack, in granola and trail mix, and is wonderful in oatmeal. Dehydrating also helps when you have fruit that isn’t as sweet as you would like. We have been getting lots of strawberries in our bountiful baskets, but frankly strawberries in winter aren’t that great. However, once you dehydrate them they become an addictive candy.  Last but not least, toddlers love helping to sort the dried fruits and vegetables into jars: helpful, educational, and fun!


Berries and Cream Steel Cut Oats

(Overnight version)

Makes 4 servings

This works well if you have two crock pots (one large and one small), but a large crock pot and a medium sized glass bowl works well too. You are essentially making a double boiler which will keep the oatmeal from scorching during the longer cooking time.

1 Cup steel cut oats

4 Cups water

¼ tsp salt

2/3 cup dried berries (I used blueberries and strawberries)

1 Tbsp brown sugar, honey or sweetener of your choice (optional)

½ Cup heavy cream (optional)


1) Put several inches of water into the crock of your largest crock pot.

2) Place oats, water, salt and berries in the crock of a smaller crock pot or in a glass mixing bowl that fits suspended inside the larger crock pot without touching the bottom.

3) Put the large crock pot on low heat, place the smaller crock or bowl into the larger one, cover with a lid and a towel to keep the heat in, and then leave it for at least six hours. In the morning, stir in cream and sweetener if using and serve.

Notes:

-If you can’t make a double boiler out of your crock pot or don’t want to go to the trouble then just spray the inside of the crock with cooking spray and place all ingredients in the crock pot on low. Don’t let the oatmeal cook for longer than six hours and expect some crusty corners.

 - Feel free to leave out the cream for a dairy free version.  The long cooking time makes the steel cut oats creamy without the addition of any dairy.

- Any dried fruit works great, just use your favorite. I love dried figs, but the kids aren’t as fond of them. Dried apples and a little cinnamon would be excellent. So would dried cranberries and pecans, raisins and cinnamon, pureed pumpkin and pumpkin pie spice, seriously I don't know what wouldn't be delicious.


Wednesday, March 13, 2013

Mom/Chef…Comforting soup for the winter doldrums


We are still having some cold, snowy days here in Northern Montana, but the majority of the time it is just cold and brown. Mud is everywhere since it warms up enough for the snow to start to melt, then freezes again. For the first time in my life I truly understand and appreciate having a mud room. An entrance to the house where people can take off muddy, wet boots and coats before it gets tracked all over the kitchen and living room. Our mud room also includes the laundry room and has an entrance straight into the bathroom, for those days when Tim comes home covered in hydraulic fluid or something equally messy.

It was cold when we moved here in November and it is still cold, the weather varying between snowy, windy and just cold and wet. Needless to say, I am ready for spring. When looking through the fridge last week, wondering aloud what to do with all the potatoes I had lying around, not to mention a bag of snap peas I’d bought for snacking but hadn’t finished, Tim reminisced about a soup from his childhood. When I think potato soup, I immediately think of a thick, hearty puree, smooth and white. Tim’s childhood soup involved picking new potatoes and peas fresh from the garden, lightly cooking them and creaming the soup out for a chunky, fresh tasting soup. As soon as he described it I was sold. Here is my version of Tim’s garden potato and pea soup. It is quick, easy and very delicious. Potatoes and peas add a little bit of spring to an otherwise windy, cold and muddy brown March.


Leek, potato and pea soup


Leek, Potato and Pea Soup.

1 ½ pounds small yellow potatoes, scrubbed clean and cut into roughly 1/2'’ dice.

1 large leek, white and light green parts only, thinly sliced into half moons.

1 garlic clove, finely chopped

1-2 cups snap peas, trimmed and cut into 1” pieces. (Frozen green peas would work fine too)

1 quart chicken or vegetable stock or water

1 cup heavy cream or dairy of your choice

Butter, salt and Pepper

Your choice of fresh or dried herbs, good choices are: Thyme, dill, tarragon. (Optional)


Slice leek in half, thinly slice into half moons and place in a large bowl full of cold water. Let the Leeks sit and soak for 10 minutes, gently swishing them occasionally to get all the grit out of the layers. Scoop the leeks from the bowl and drain, leaving the gritty water in the bowl.
 

Wash and dice potatoes, if you are doing this ahead of time, you can put the potato pieces in a bowl covered with cold water until ready to use.
 

Melt 2 Tablespoons of butter in a large pot over medium heat. Add drained leeks and add a pinch of salt. Cook the leeks slowly until they get very soft and lightly browned, about 10 minutes. When leeks are soft add garlic and cook 1 minute. Then add the potatoes, herbs if you are using them, and stock. Bring to a simmer and let cook until the potatoes are cooked through but not too mushy. 15 or more minutes, depending on the size of your potato chunks. If you are using snap peas then throw them in halfway through the potato cooking time, frozen green peas can go in at the very end. Once potatoes and peas are cooked through, add the dairy and taste for salt and pepper. Potatoes tend to soak up a lot of salt, so don’t be afraid to add plenty. Let the soup warm (but don’t let it boil) for about 5 minutes and serve. Eat and think of spring.


Monday, March 11, 2013

Mom/Preservationist….The weekend canning project part 2.


So in the last post I wrote about how we used up the 25 pounds of tomatoes. Now it’s time for the 20 pounds of citrus.


Over the first week we had eaten some of it, maybe 5 pounds. We ate the pomelo and some of the oranges and mandarins. But there was still plenty left that needed to be used up. Now when I have extra citrus I think marmalade, because I love marmalade. I researched several recipes and ended up cobbling together this one from AltonBrown and this one from Food in Jars. The Alton Brown method has you boil the thinly sliced oranges for about 40 minutes until the peel is soft. The Food in Jars method calls for an overnight soak to soften the peel. I decided on a several hour soak followed by a 15 minute boil. That way the oranges could soak while the tomato sauce and ketchup took up the stove, and then go on to cook for a (hopefully) shorter cooking time while the pressure canners cooled off from the tomatoes.

Okay, here’s my process (this is not really a recipe, just the process I used).

First I separated the Seville (a.k.a. sour) oranges from the rest of the citrus. I ended up with about 3 pounds of Seville oranges and about 5 pounds of mixed Navel oranges and tangerines. There were also a good 3 pounds of mandarins and 4 small blood oranges. The mandarins were set aside and the blood oranges I put in the fridge for later snacking.

I washed all the citrus then thinly sliced it, keeping it separated into two batches, Seville and mixed citrus. The Seville oranges are super seedy and hard to work with. The best way I found is to cut the oranges into halves then cut out the center pith. That gets out a good portion of your seeds, and the rest are easier to pick out as you thinly (1/16”) slice the orange halves.

so many seeds!
 
Don’t throw away the seeds and center pith, those can go into a pile on a piece of cheesecloth along with the end slices from each orange, they’ll come in handy later.
seeds and pith trimings
 
The orange slices to into a big bowl and get covered with water. Since our well water is kind of soft and baking soda-ish tasting, I always use filtered water for cooking. Gather up the cheesecloth into a bag and tie it closed with kitchen twine. Place it on top of the submerged oranges and let sit on the counter at room temp. Cover with a plate or plastic wrap if you have dogs in the house that shed a lot.
soaking oranges
 
When you are ready to start cooking your marmalade, dump the citrus and the cheesecloth bag into a large pot and bring to a boil. Simmer, skimming off any foam, for 20 minutes or until the peel of the fruit has softened. Remove the cheesecloth bag and stir in the sugar. Seville oranges are very sour so I used probably 6-7 cups of sugar for 3 pounds of oranges. I started with 5 cups and then tasted it throughout the process until it was the sweetness level that I wanted. Stir the sugar in until it dissolves and place a candy thermometer in the pot. Let the marmalade simmer until it reaches 220 degrees. I think my marmalade didn’t quite make it past 210, but if you put a small plate in the freezer when you start cooking your marmalade you can use the plate test. If you think your marmalade is ready, pull the plate out of the freezer and put a drizzle of the marmalade on the plate. If it jells up pretty quickly then you are done. If it stays runny then you need to cook it more.

Now my naval orange/tangerine marmalade gave me a little bit of trouble. Seville oranges are chock full of natural pectin so they jell up just fine. The tangerine mix didn’t seem to have quite as much pectin in it; I used 5 cups of sugar for the 4 pounds or so of citrus. It tasted sweet enough to me but didn’t jell very firmly during the plate test. I had taken Alton Brown’s advice and added a lemon to the marmalade for the extra pectin, but it still wasn’t firming up. I ended up adding 2 packets of liquid pectin to help it along, because at that point I didn’t want it any sweeter and I had been boiling it for over half an hour and didn’t want to overcook it. It eventually set up, but it isn’t as firm a jell as the Seville orange marmalade is.  All the marmalade was processed in the water bath canner for 20 minutes. (I always add a little extra time to my processing because of our altitude.)
marmalade close up
 

Finally, to end our citrus saga, I peeled all the ‘cutie’ style Mandarin oranges,which, due to their easy to peel-ness, is a great thing for toddlers to help with . Connor had fun getting the peels off.
Mandarin oranges being peeled
 
 Then I made a simple syrup of 5 ¾ cups water to 1 ½ cups sugar, placed the orange segments in clean jars, covered them with the hot simple syrup and processed them in the water bath canner for 15 minutes. Voila, homemade canned mandarin oranges. For basic, “can it be canned?” questions, I have found this site, "Pick Your Own" to be very helpful.  Pick Your Own is actually a farm's website but they have such a comprehensive canning and preserving section that I find myself consulting them regularly.

canned mandarin oranges
Since blogging about this process has taken me four times as long as the actual canning weekend did, I will very quickly mention that I also made 4 pints of apple sauce using the recipe from “Homemade Pantry” and 2 quart jars of lemony cauliflower pickles, recipe originally from the amazing author of Food in Jars. The cauliflower pickles are refrigerator pickles so they didn’t have to be processed in the canner. They are lemony, salty and amazing as a side to a snack of cheese and crackers. The kids love the applesauce. Alana uses a food mill to puree her apple sauce nice and smooth whereas I usually leave mine chunky. I tried the food mill version and the kids have both been devouring it.

so...much...canning...
 

Here ends this month’s canning saga. Sorry it has taken me so long to update. I find when I have to choose between sleep and blogging, sleep has been wining out lately. I have several more posts planned, so hopefully I can get them out in a reasonable time and this site will start to feel like a real blog again.